The best camera gear for travel photography beginners
by ling and jace
home / back to photography

Rose Valley Cappadocia, Turkey | Sony A7III with Sony 24-105/f4 lens
ISO 50, 57mm, f4, 1/640 s
We started photography as we travelled because we were visiting so many incredible natural wonders and were both in awe of everything that we were seeing. We used our phone cameras at first, then an old, second-hand DSLR, and eventually decided that we’d need to invest in a good camera so that we could capture even more.
Our ideal photography is extremely spontaneous—we travel lightly, without many plans, and find ourselves reaching for a camera at pretty much every turn. The camera gear that we chose reflects this and has been perfect for starting travel photography.
We’ve included everything that we researched as beginners when deciding to buy our first camera for travel photography, as well as our lenses, accessories and storage equipment.
Quick list
CAMERA GEAR
/ Sony a7iii
/ Sony 24-105/f4 G OSS lens (main lens for shooting)
/ Tamron 17-28/f2.8 Di III RXD Sony E-Mount One (wide angle and low light lens)
/ Sony 70-200mm/f2.8 (telephoto lens)
DRONE
/ Mavic Pro 1
ACCESSORIES
/ inca i531 tripod
/ Peak Design Cuff III Wrist Strap (the most important camera accessory we have)
/ Sony LCS SC8 camera bag
VIDEO
/ iPhone 12 Pro Max & 6S+
/ DJI Ronin-S stabiliser
/ Rode VideoMicro Microphone
1. Finding your style of travel photography
To get started with travel photography, we really believe that you can practice on any kind of equipment. We first started framing photos just with our phone cameras (which have only gotten better since), and eventually started using a very old second-hand DSLR camera. It was really important to just get started with whatever we had, and try a lot of different things before we found our style and knew what kind of photos we wanted to take.
Eventually, it was easy to know when we needed to upgrade because we had a really clear ideas for our photography, but were feeling limited by the outdated gear that we had.
Our travel photography has evolved a lot over time and now covers quite a wide range of things—we want to be able to capture the scale of landscapes we’re visiting, but also small details along the way. A lot of our photos also have either one or both of us in the frame.
For this kind of travel photography, we’d say the essentials are a great camera body, one versatile lens with a wide focal range, and a sturdy tripod. When we were researching gear, we looked for cameras with a full frame sensor, and wide-angle lenses that capture as much scenery as possible. Our ideal, perfect combination has been the Sony A7III with a Sony 24-105/f4 G OSS lens.
Along with our main camera and lens, we also eventually bought a drone, two more lenses, and a few other accessories which really add to our kit. But we want to mention that we picked these things up over a period of two years, and they are absolutely not necessary for getting started.

Sunset light in Aphrodisias, Turkey | Sony A7III with 24-105/f4 lens
ISO 50, 34mm, f5.6, 1/200 s

Lupins in Lake Tekapo, New Zealand | Sony A7III with Sony 24-105/f4 lens and tripod
ISO 400, 51mm, f6.3, 1/640 s
2. best camera For Travel Photography: MIRRORLESS vs DSLR
Before looking at brands for camera bodies, one of the first things to research is whether a mirrorless camera or a DSLR camera will be best suited to the type of photography that you’re interested in.
When we first started, we were originally learning to shoot on a second-hand DSLR (which was Ling’s dad’s old camera). We learned a lot about composition and framing when we were using that old model, but when we researched gear for ourselves to upgrade to and invest in, we ultimately decided that a mirrorless camera would be the best option.
The main reason is that a mirrorless camera makes learning to shoot in manual so much easier because the camera shows exactly what is going to be captured—when you look at either the LCD screen or through the electronic viewfinder on a mirrorless camera, you can see the adjustments that you’re making in real time. If you change the ISO, you can see exactly how it impacts the lighting of the scene that you’re capturing. Shooting with a mirrorless camera really sped up our learning process because it takes all of the guess work out of shooting, and makes it easy to adapt to different and changing lighting conditions everywhere we go. On a DLSR, you can change all of the settings you want, but because the optical is a mirror of the raw scene in front of you, the only way you can see the effects of your changes is on the LCD in playback. This makes shooting in manual a lot more difficult because of how much slower it is and how much more guesswork is involved in the settings.
Apart from being easier to use, mirrorless cameras are also much smaller and lighter because they don’t have a lot of internal components that DSLR’s are made of, which makes a lot of difference when we’re travelling and hiking.
However, a downside of mirrorless cameras is that both the body and the lenses will often be more expensive than a DLSR set up because it’s a much smaller and niche market than DSLRs.

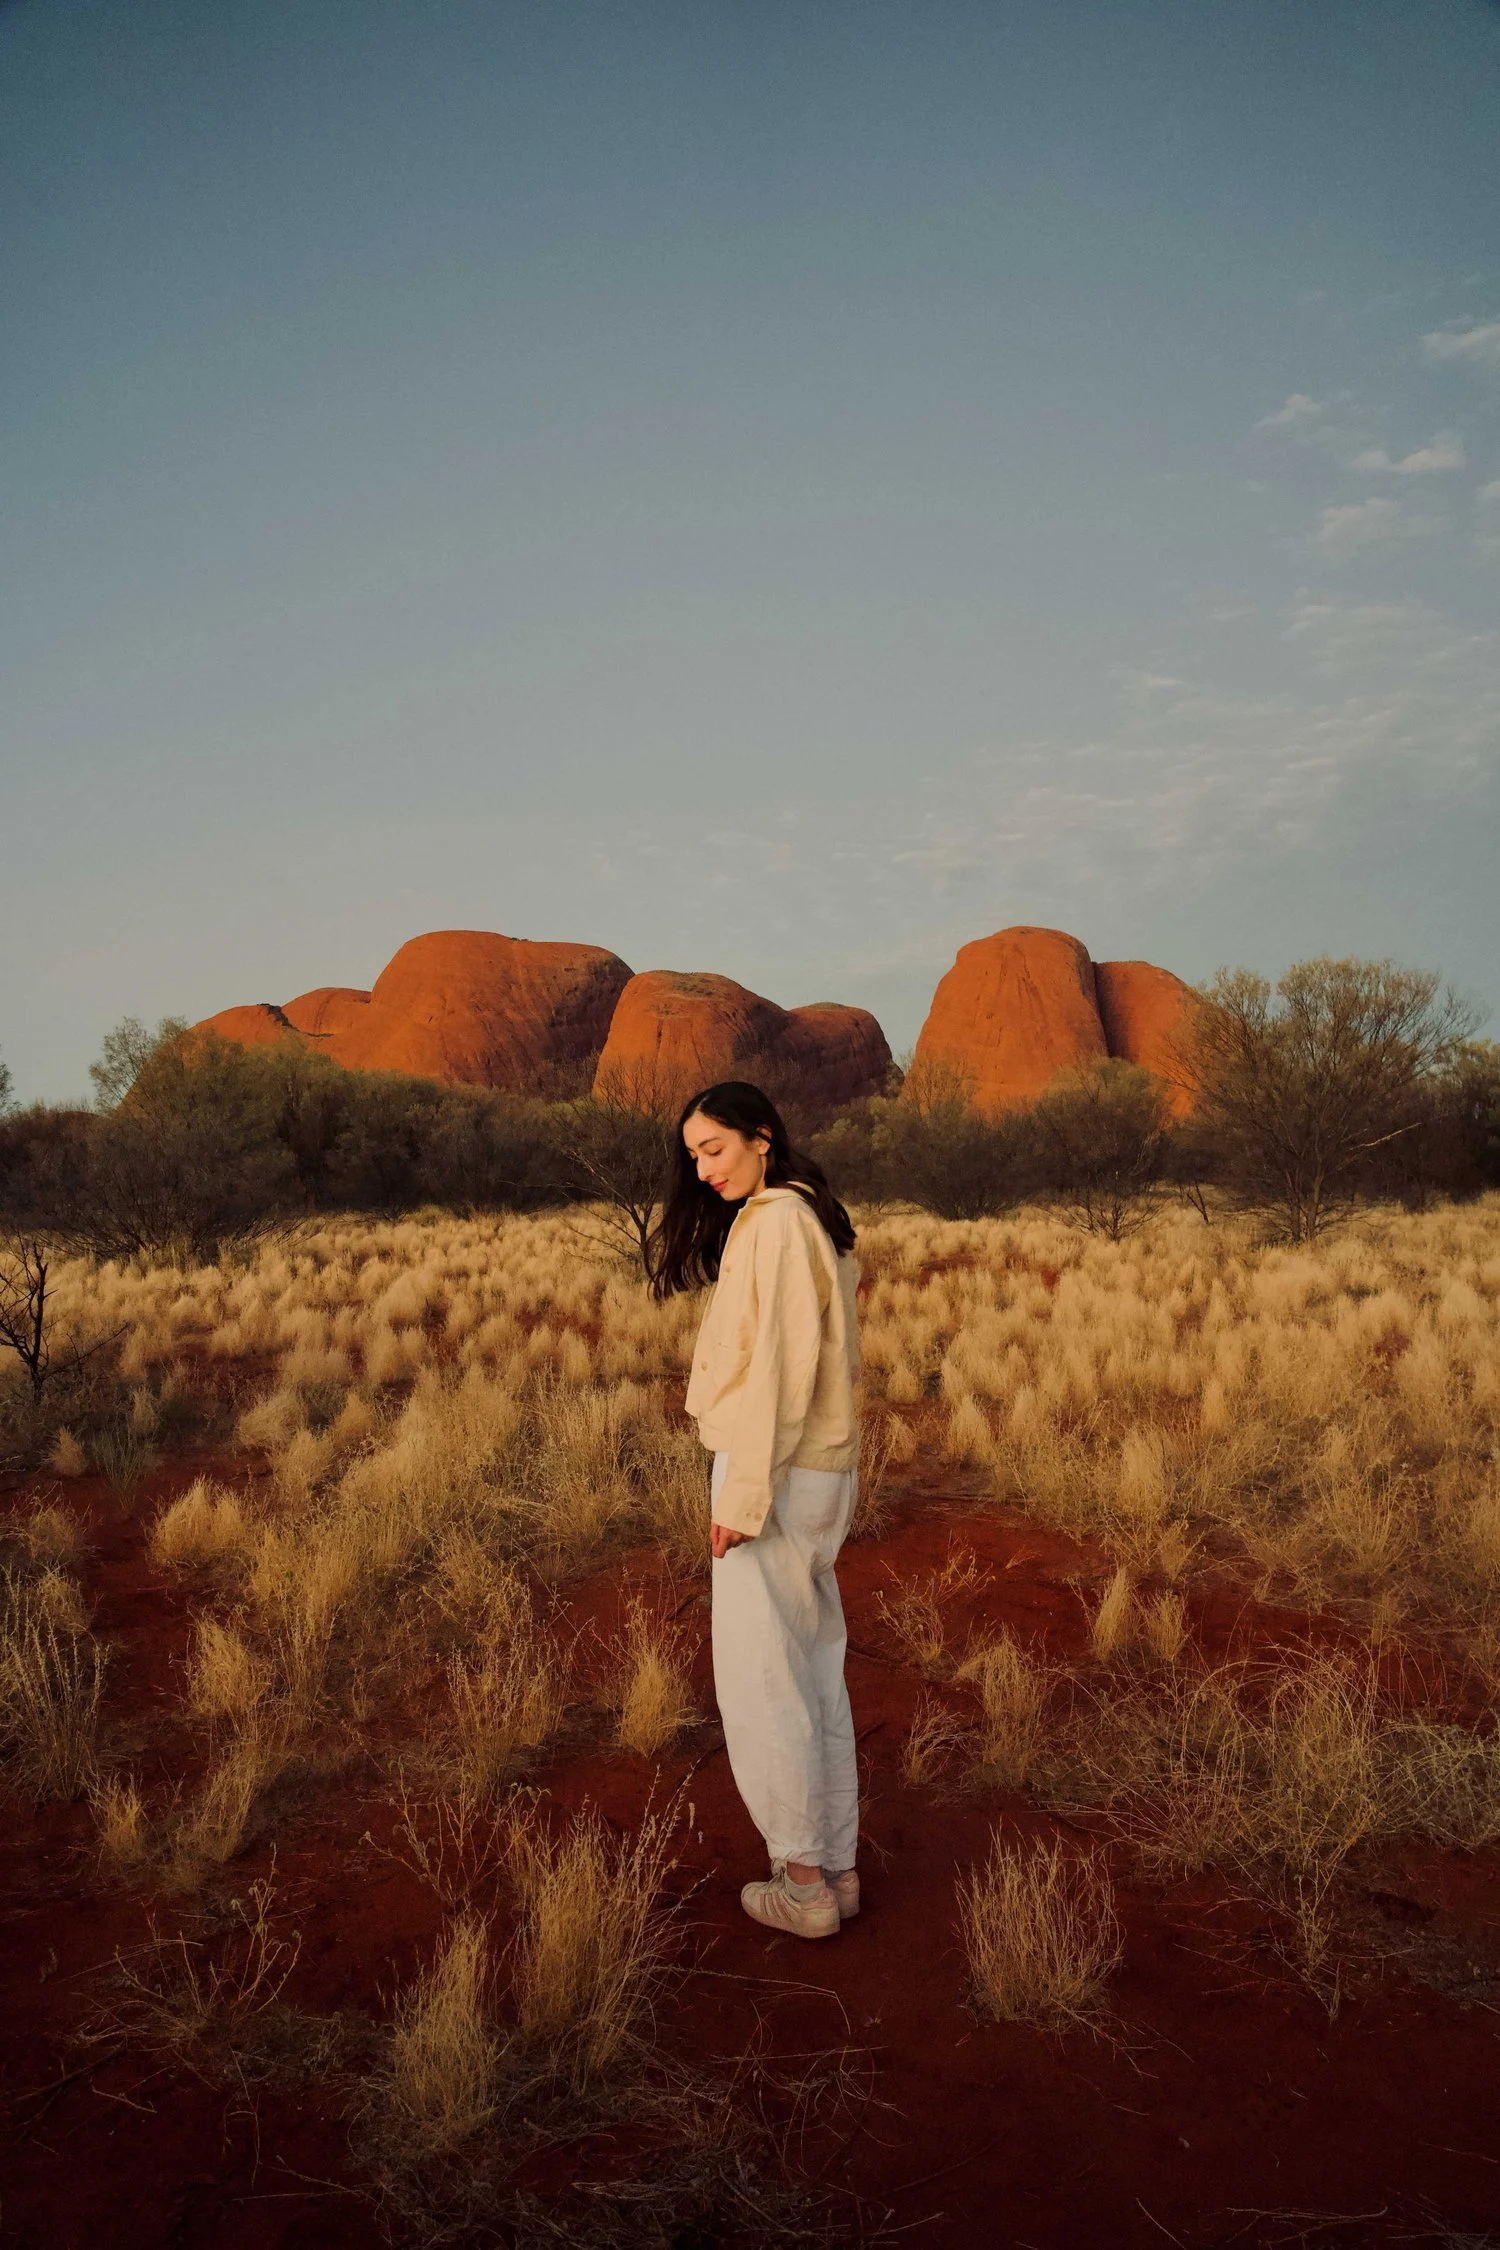
Roadside view in | Sony A7III with Sony 24-105/f4 lens
ISO 500, 24mm, f4, 1/400 s

Sunrise over Lake Mungo | Sony A7III with Sony 24-105/f4 lens
ISO 800, 24mm, f8, 1/400 s
SONY A7III REVIEW
Pros
There’s a lot that we love about the Sony A7III mirrorless camera:
it’s so light and compact that we barely feel it in our backpacks and it never gets tiring to hold;
the quality of shots speaks for itself—we really like how it picks up blues in particular;
it performs exceptionally well in low light, with noise barely recognisable until about ISO 6400;
the wifi connection has made shooting from our phones without a remote controller and transferring photos really convenient;
it’s easy to manually focus because the display can magnify the focal point by 5.9x, making it a lot more precise;
it also has an impressive autofocus;
it has a great battery life (Sony and other photographers say it lasts about 710 shots, but to us it feels almost unlimited across the day. It has always lasted at least a whole day of shooting without needing to switch to our second battery);
the two SD card slots are really useful as we often come away with thousands of shots each day; and
despite being so light, it’s also much sturdier than it looks and feels.
Cons
One downside we’ve noticed is that greens are sometimes a bit washed out, but that has been easily fixed in editing.
Other than that, pricing is the other huge issue—the body is pretty steep. It was around AUD$2000 when we bought it in 2019, and Sony lenses are expensive.

Lake Pukaki, New Zealand | Sony A7III with Tamron 7-28/f2.8 lens and tripod
ISO 100, 59 mm, f9, 1/160 s

Blue Pools, New Zealand | Sony A7III with Sony 24-105/f4 lens
ISO 50, 26mm, f4, 1/640 s
3. The most versatile lens for travel photography
Sony 24-105/f4 G OSS
For travel photography, we recommend you use a lens that gives you a broad focal length and decent performance in low light.
Nearly all of our photos with the Sony A7III have been taken with a Sony 24 24-105/f4 G OSS, which is the best lens we’ve ever used. It’s extremely versatile because it has a huge focal range, so we’re able to take reasonably wide landscapes as well as portrait shots and small details, all with the one lens. The wide focal range makes it the perfect lens to travel with as we can use it nearly all situations. The f4 aperture also makes for some decent bokeh in close up situations.
The only cons are that we do find that it adds a lot of weight to the camera body (although the full rig is still lighter than a DSLR), and that the f4 limit on aperture can mean that shooting in low light can get a bit difficult.
4. Pick up a sturdy tripod
When we were travelling through South America, Ling’s family came to join us found around 6 weeks. They also love hiking and photography, and helped us to take the very first photos that we would now consider as being in our style. From that trip, we went from just taking a few photos of the landscape here and there, to really trying to capture a sense of scale with people in the frame, too. After they left, the first thing that we did was buy a tripod so that we could keep shooting this way—the only problem was that we thought we were getting a good deal when we found one for $20, but it could actually barely support the weight of the camera in any wind.
Many of the photos that we take now wouldn’t be possible without a tripod (including night photography), so it’s really important to invest in something sturdy that we don’t need to worry about when placing it on hills, near water, or in windy places. We currently use an Inca i531 tripod.
To use the tripod for our shots, we usually find the frame and then set our camera to interval shooting so that it takes a photo every 1-2 seconds. The Sony A7III also has inbuilt wifi, so we can connect it to a phone and see the shot that we’re taking from far away.
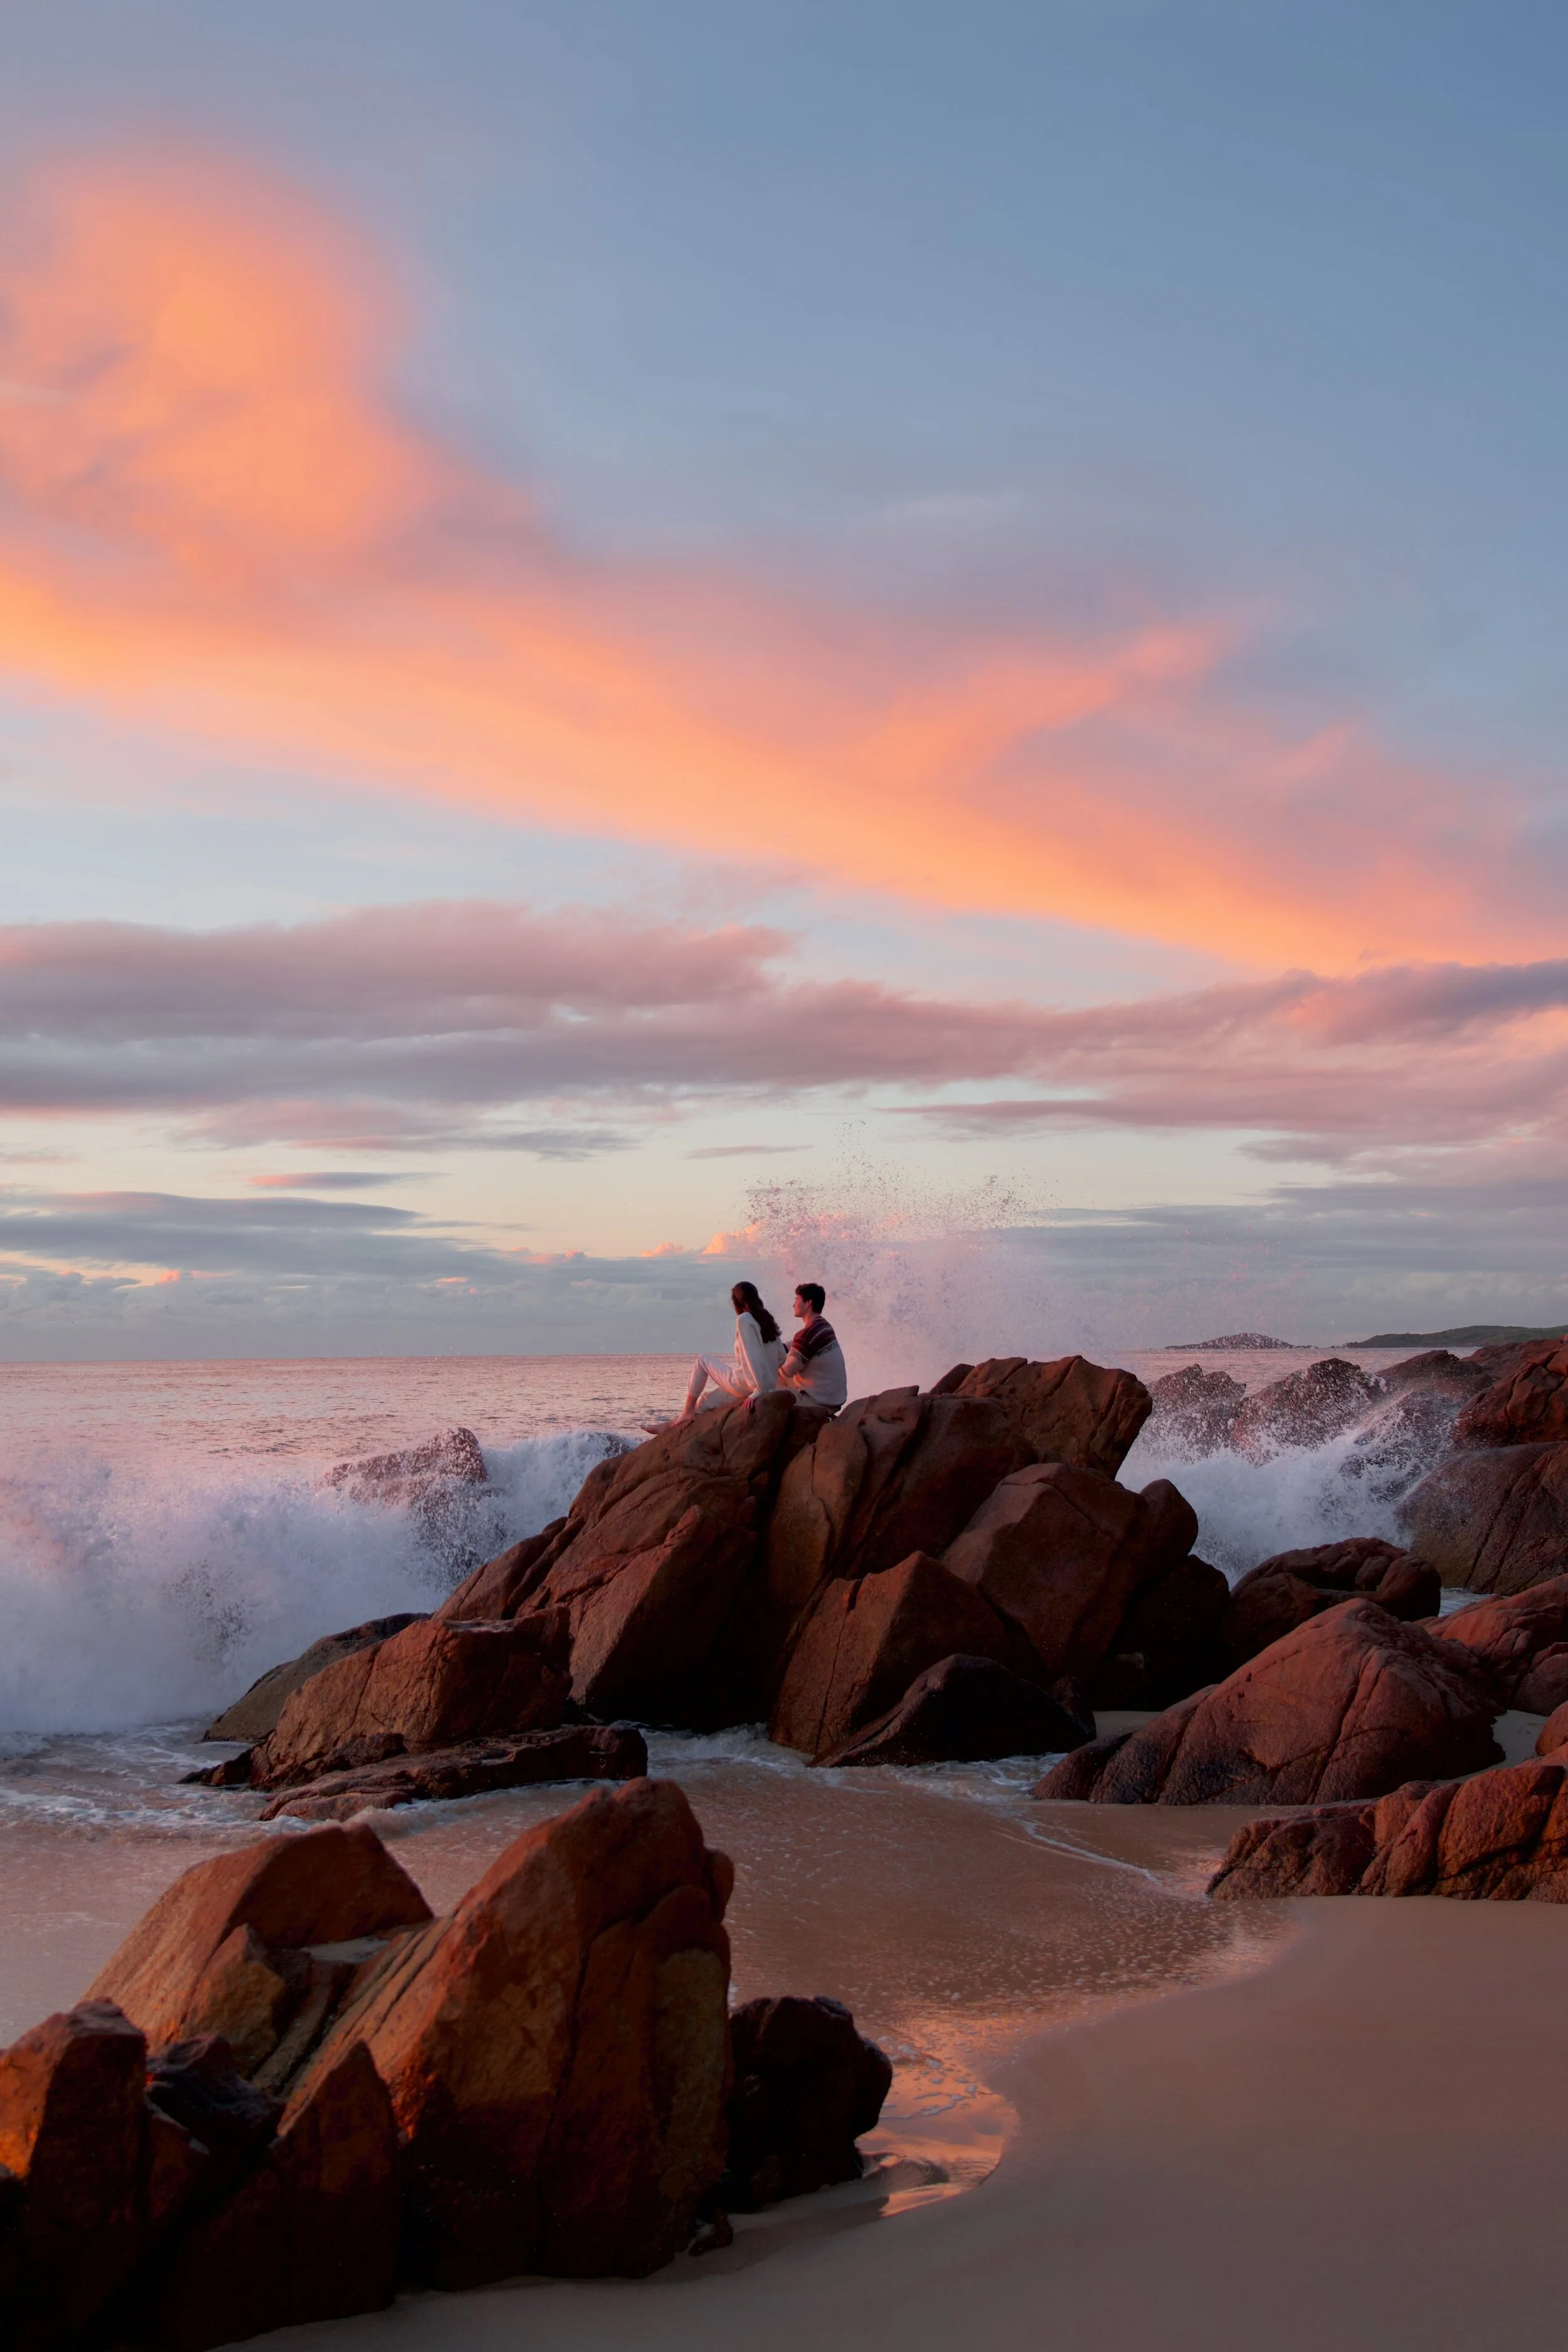
Sunrise at Zenith Beach, Australia | Sony A7III with Sony 24-105/f4 lens
ISO 100, 35mm, f4, 1/60 s

View of Tomaree Head, Australia | Sony A7III with Sony 24-105/f4 lens
ISO 250, 24mm, f4, 1/800 s
5. Camera accessories for travel photography
There are a few accessories that have made travel photography so much easier for us. The best accessory that we own is the Peak Design Cuff III Wrist strap. Having the camera strapped to our wrists is much less restrictive that having it around the neck. Especially with the lighter mirrorless camera, it’s easier to hold and gives us so much more mobility when shooting.
The other thing that we take everywhere is the Sony LCS SC8 camera bag, which comfortably fits the camera body and two of our lenses (Sony 24-105/f4 G OSS lens and Tamron 17-28/f2.8 Di III RXD lens). When we’re travelling or hiking, we also usually pack spare batteries and SD cards, an SSD hard drive, and a lens cleaner, cloth and air blower (which are all essential in dusty places).
6. Optional wide angle lens with low aperture
Nearly all of our photos have been taken with the Sony 24-105/f4 lens. But in some places we visited, the lens wasn’t able to capture enough detail in low light. We started seeing so many scenes that we wanted to capture at night and eventually decided to look at lenses with lower f stop potential.
After about one year, we decided to invest in a Tamron 17-28/f2.8 Di III RXD so that we could cover super wide landscapes and get further into astrophotography. It has been great for both, and we’ve been really impressed by the sharpness and quality of images that we’ve taken with this lens at night.
The Tamron 17-28/f2.8 is also super light, and the lens features an inwards zoom so it doesn’t need to extend when changing focal lengths. The only con is that we’ve noticed an obvious vignetting and a loss of sharpness in the corners of some shots, which isn’t a dealbreaker but not something we enjoy.

Milky Way over outback NSW, Australia | Sony A7III with Tamron 17-28/f2.8 lens
ISO 5000, 17mm, f/2.8, 13 second exposure

Blood moon above Blue Mountains, Australia | Sony A7III with Sony 70-200mm/f2.8 telephoto lens
ISO 320, 200mm, f2.8, 1 second exposure
7. Optional telephoto lens
The third lens that we’ve added to our photography kit is a Sony 70-200mm/f2.8 telephoto lens. It definitely isn’t necessary for general travel photography (the Sony 24-105/f4 has been perfect for most situations that we shoot in), but it has been really useful for low-light settings and finding unique angles of a landscape. We mostly use it for taking photos of wildlife and the moon.
8. Using a drone for aerial shots
Most of our aerial shots have been taken with a Mavic Pro 1. However, there are so many restrictions on flying drones, especially in Australian national parks, that we don’t actually use our drone nearly as much as we thought we would.
The Mavic Pro 1 is one of the earlier models but it’s been good for us as beginners in travel photography. It can shoot in RAW, the photo quality is decent at 12 megapixels and it’s very sturdy. Unlike most other drones and later Mavic models, it can shoot in portrait (which is convenient for our prints and Instagram’s 4x5 crop).
However, for the price range right now, the later models of Mavic drones are better (unless you were going to get one second hand).

Aerial view of Stockton sand dunes, Australia | Mavic Pro 1

Aerial view of whales in Anna Bay, Australia | Mavic Pro 1
9. Best storage for travel photography
We take a lot of photos, so one thing that we’ve really had to invest in is storage—especially memory cards and hard drives. For travel photography, we’d strongly recommend buying solid state drives (SSD) instead of general external hard drives (HDD) because it’s built as one unit, so there are less individual parts at risk of breaking, and they usually have a faster reading and copying speed than HDDs.
When we’re on the road, we offload all of our photos on our portable Samsung T5 SSD every night (it’s tiny and lightweight so we can easily pack it in our camera bag). We then back everything up at home onto our other portable HDDs, and don’t take them with us anywhere so that we don’t risk breaking them (which has unfortunately happened before).
STORAGE AND EDITING GEAR
/ 64gb SanDisk Extreme Pro SDXC UHS-I SD Card x2
/ 256gb SanDisk Extreme Pro SDXC UHS-I SD Card x1
/ 64gb SanDisk Extreme Pro SDXC UHS-II SD Card x1
/ 4TB Seagate One Touch Portable Hard Drive x1
/ 1TB Toshiba Canvio Basics Portable Hard Drive x2
/ 1TB Samsung T5 Portable Solid State Drive x1
RECENT POSTS


PINTEREST:

Find us on Instagram


One of the best activities to do while visiting the heart of Australia is taking a scenic flight over Uluru, Kata Tjuta and Lake Amadeus.